Breed Experiments – Shetland/Tussah Silk

January 15th, 2019

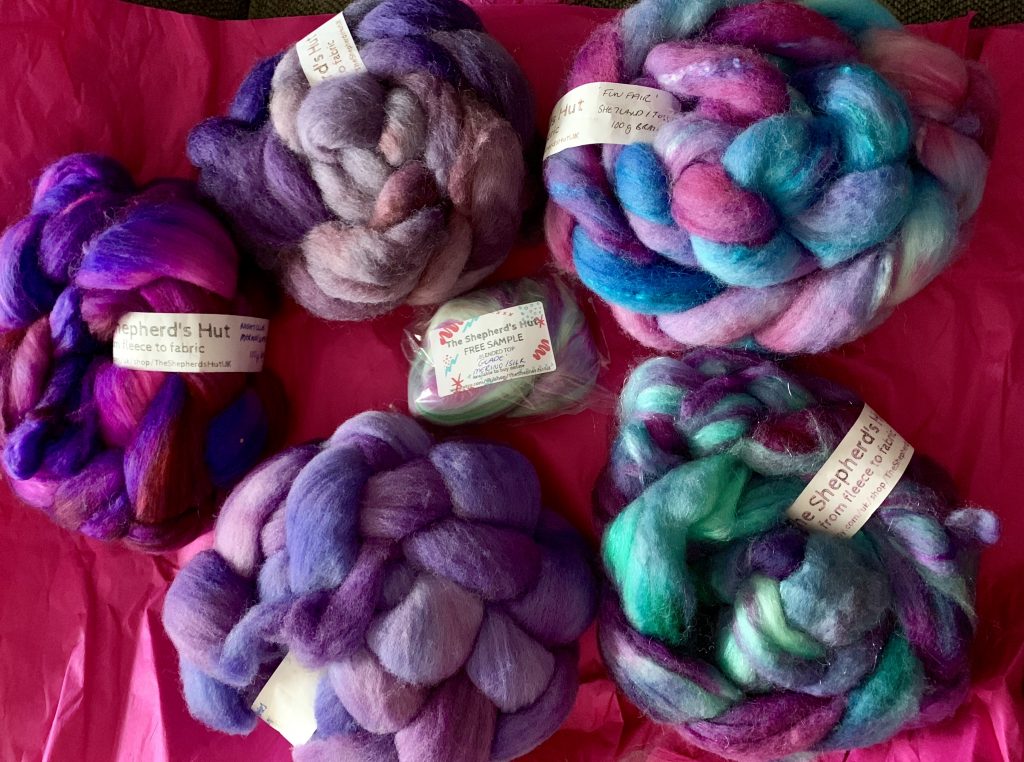
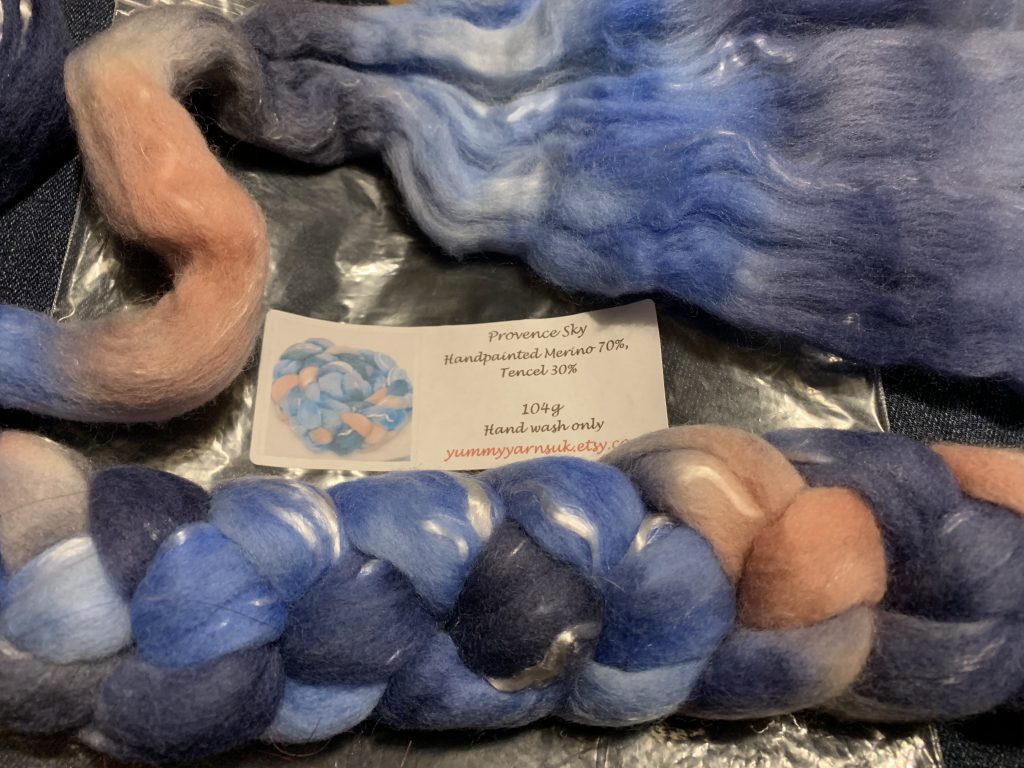
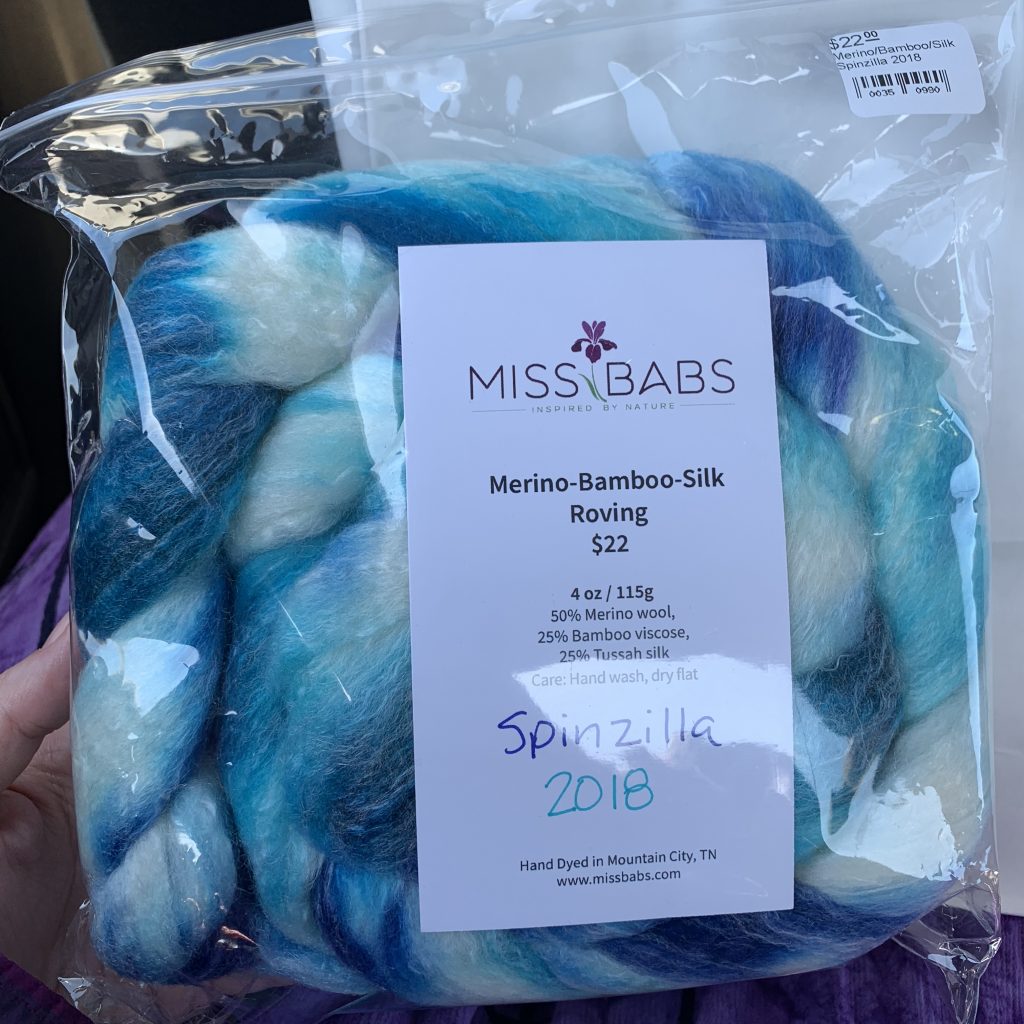
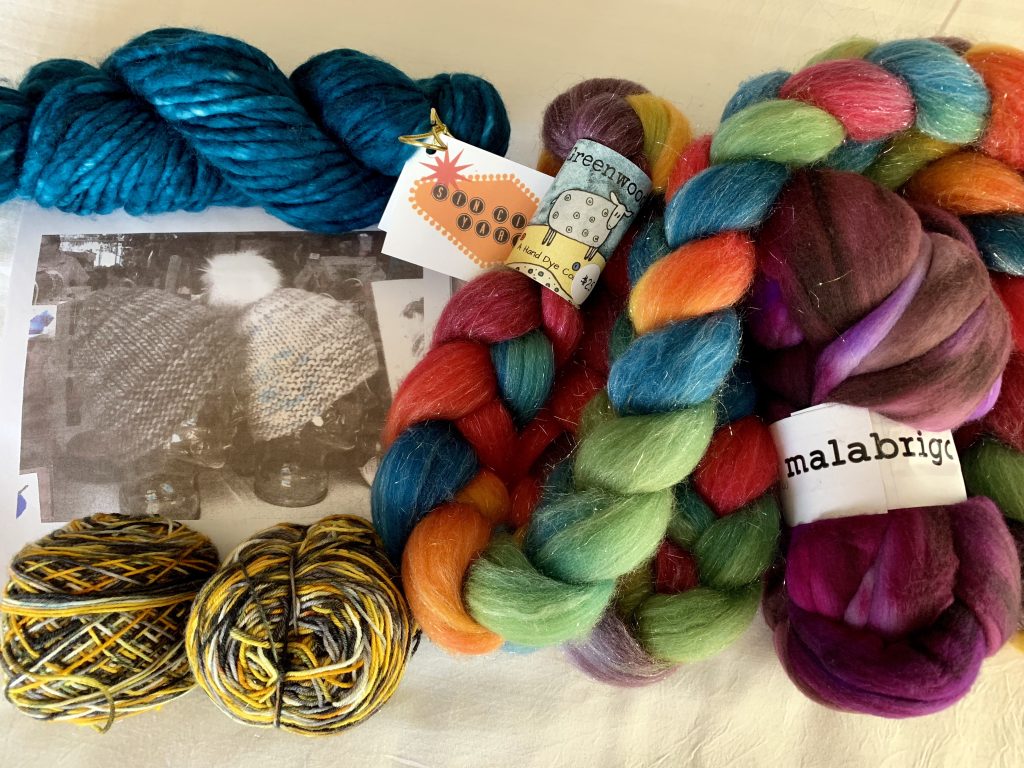
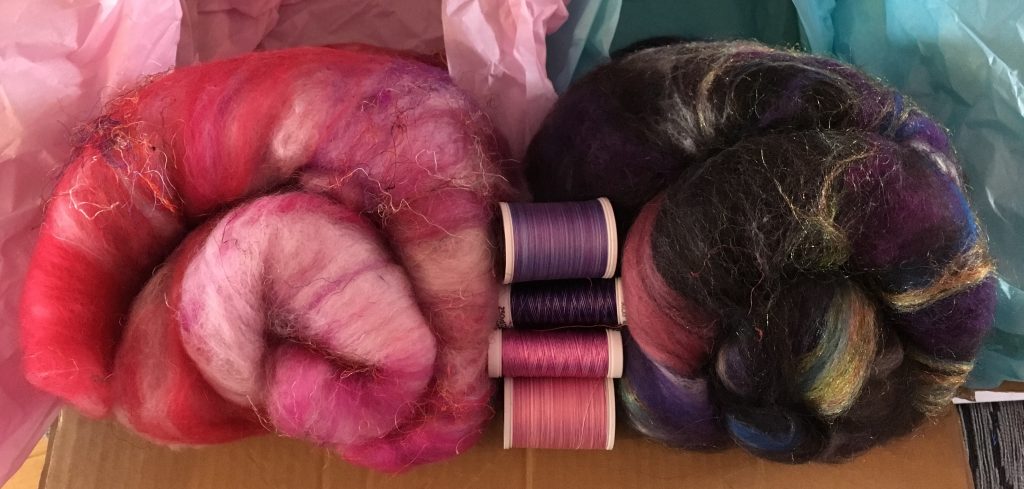
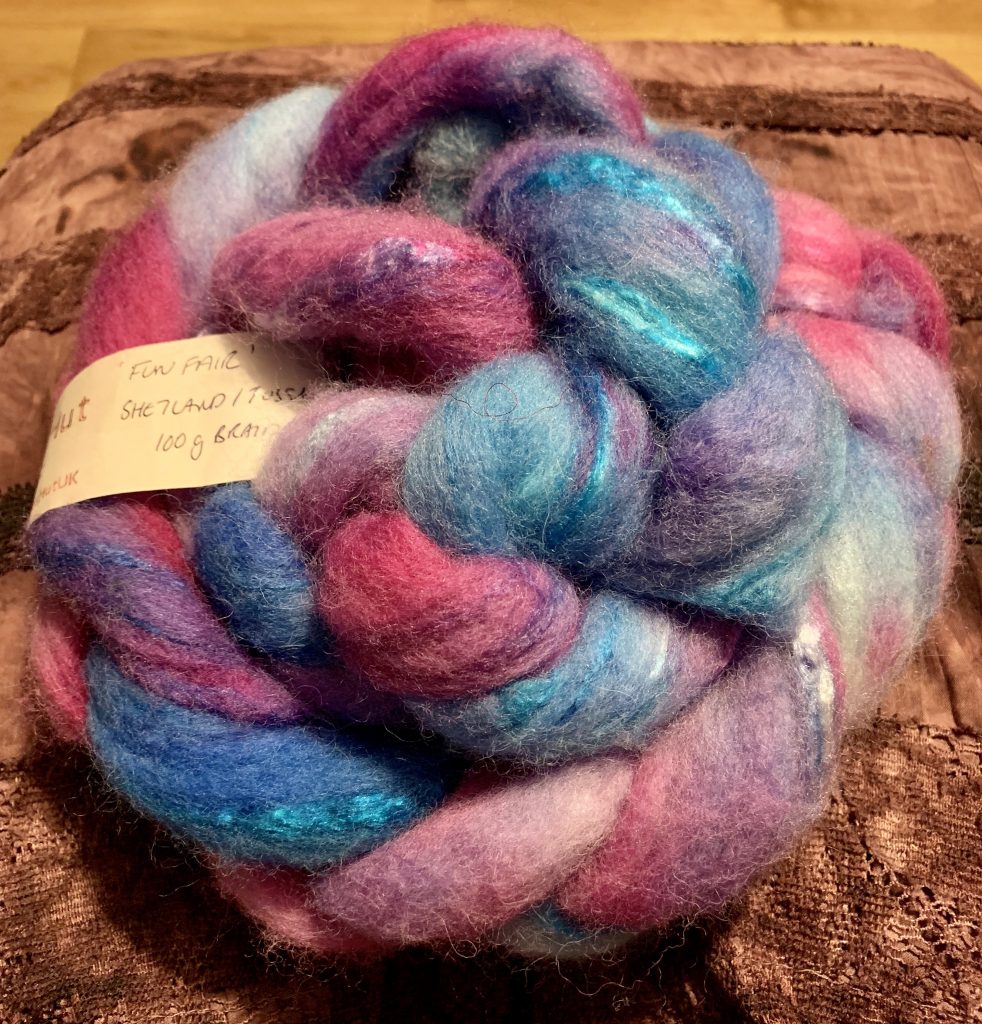
Apparently I’ve been spinning a lot! :o)  I’d better catch up on some writing or I’ll end up far behind!  Over the weekend I spun up another 2 braids but I’ll split them across 2 posts for easier referencing later.  The first one was this Shetland and Tussah Silk mix, again from The Shepherd’s Hut.

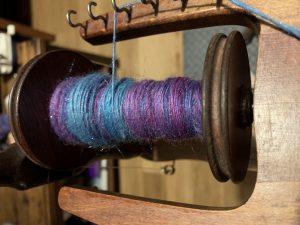
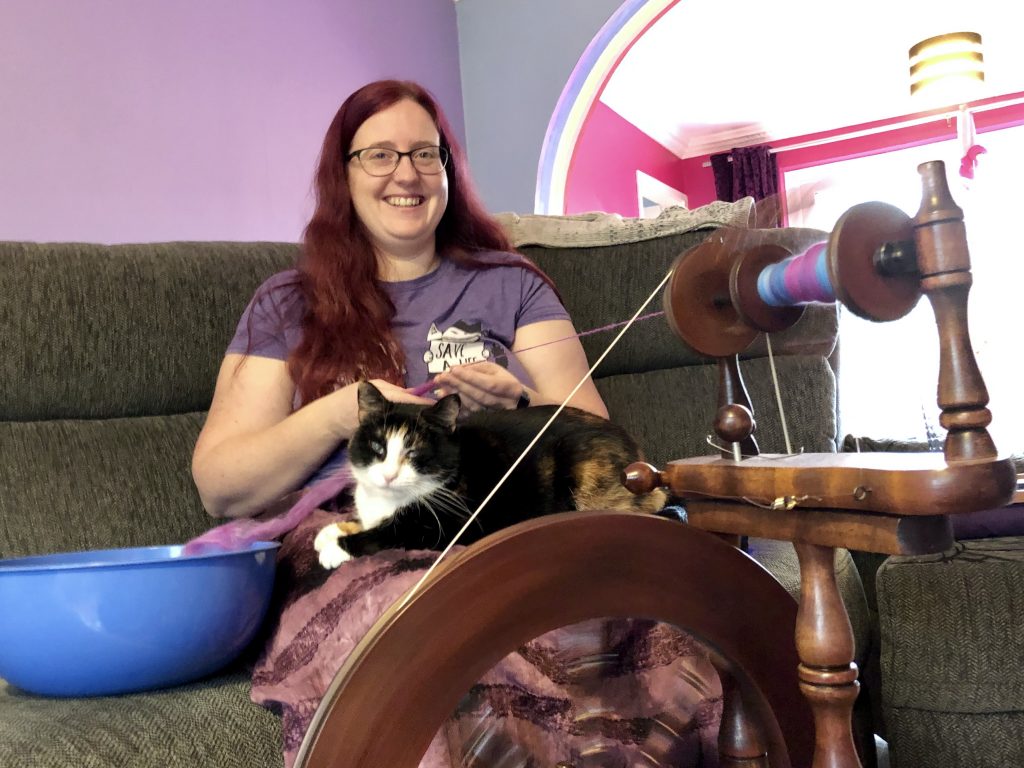
Here’s a rare photo of me actually doing the spinning as Amy was quite insistent on being a part of the process!  She seems to have decided that a slightly wobbly lap is better than not getting to sit on me :o)

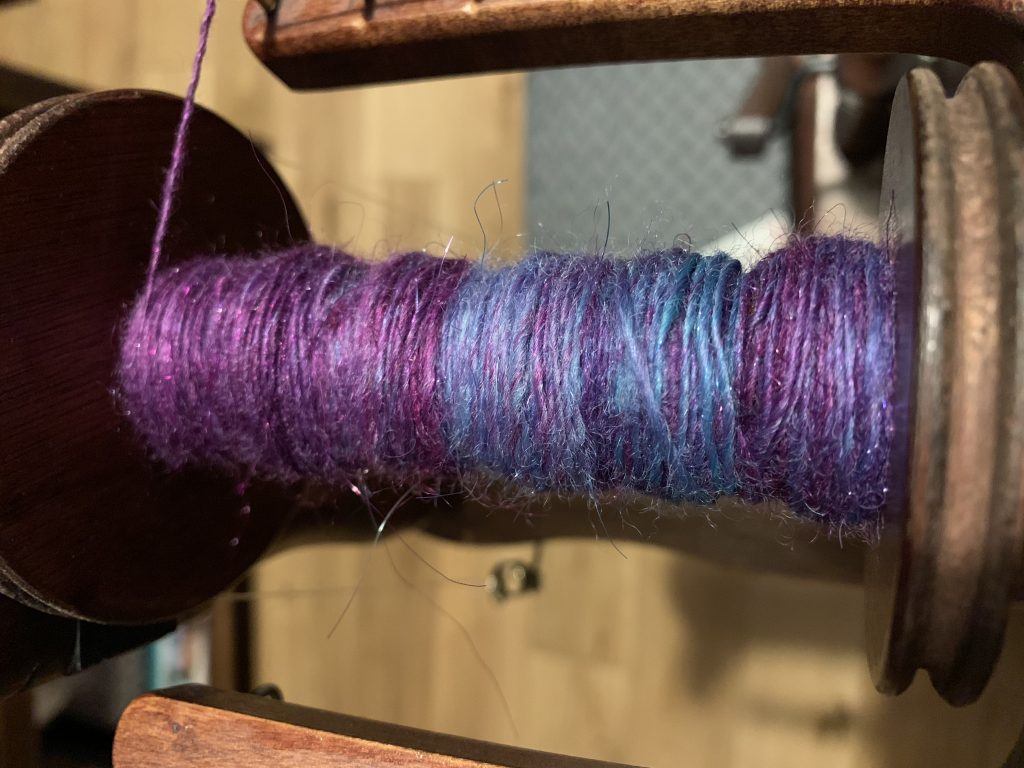
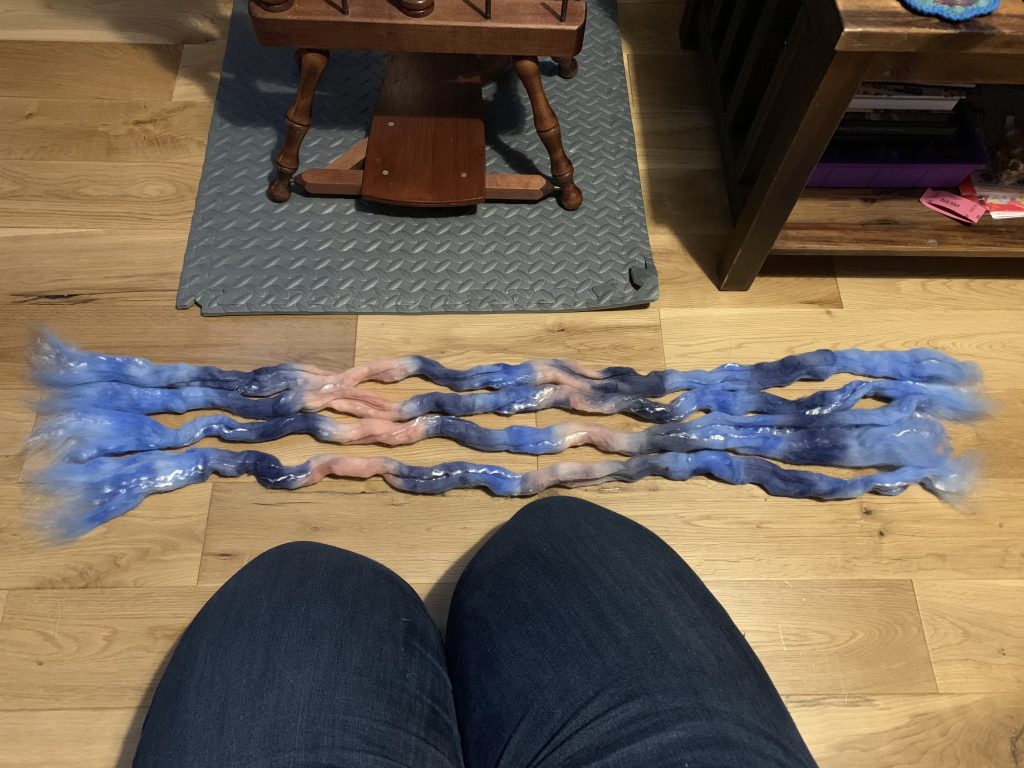
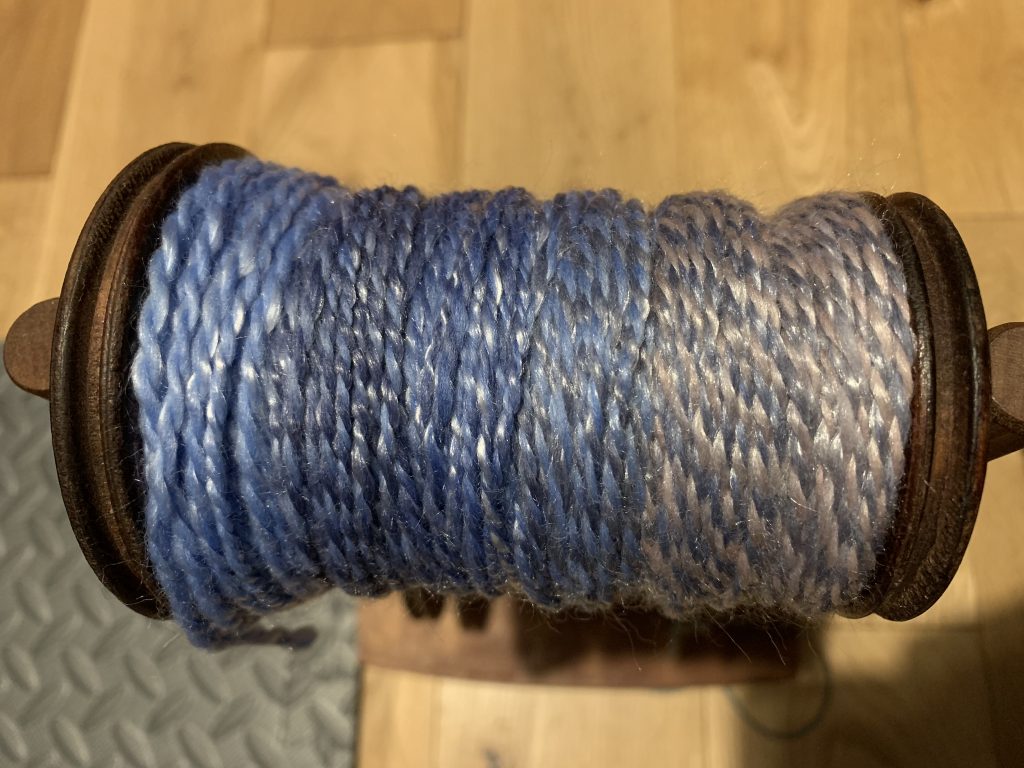
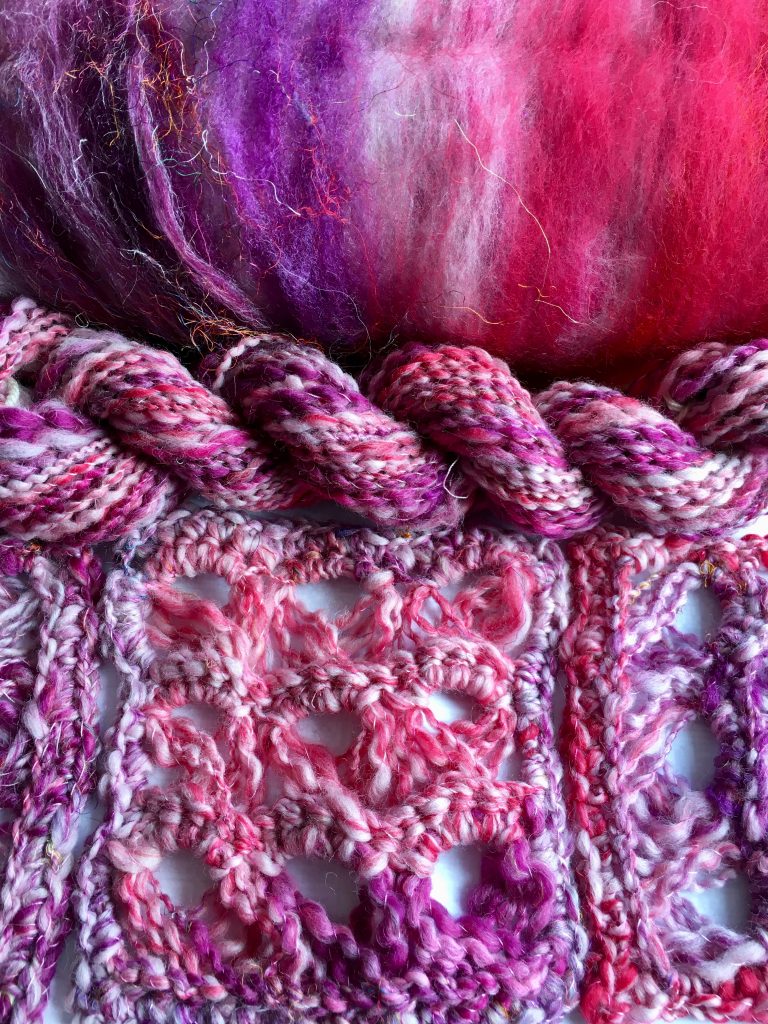
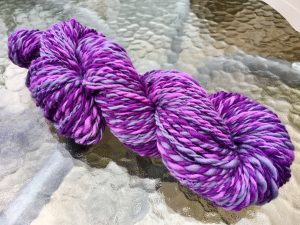
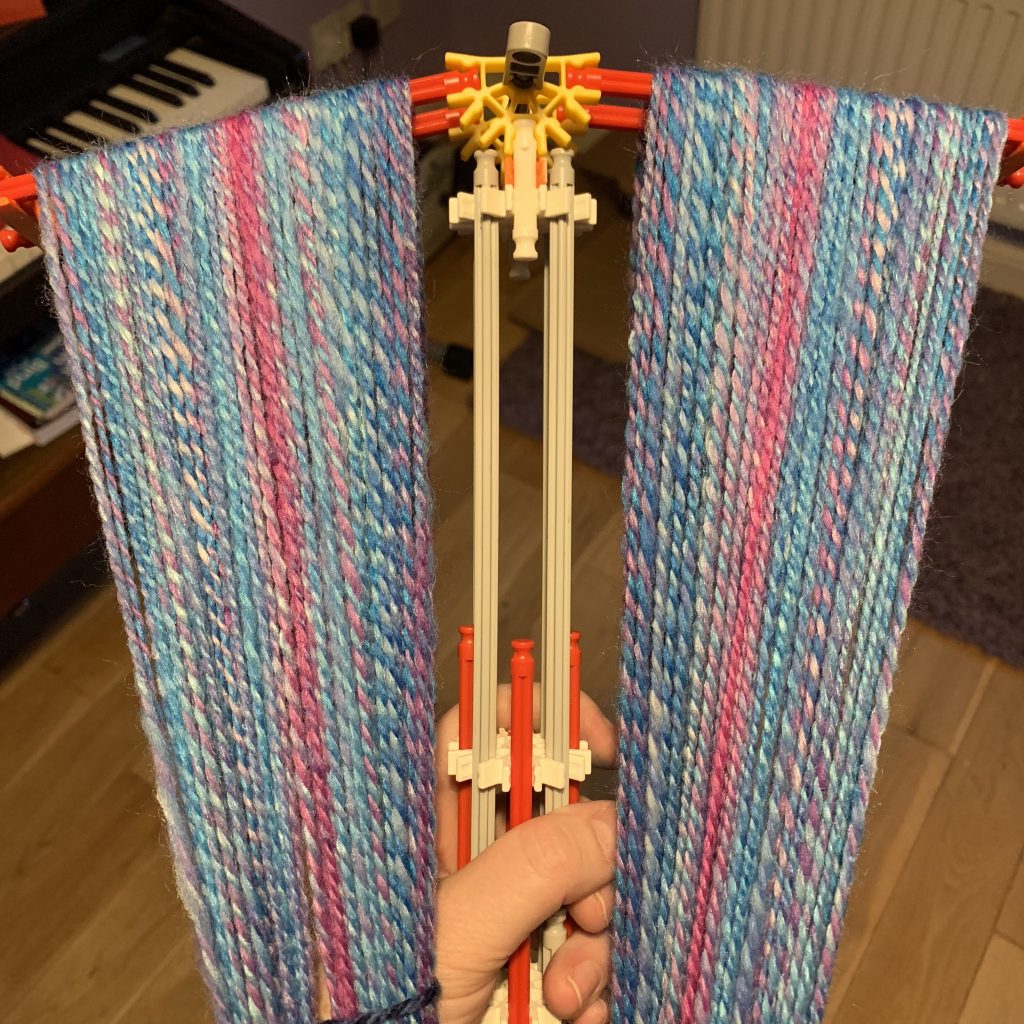
The first half I just gave a little pre-draft and then started spinning.  This was really easy to spin and was making a very consistent thickness, even with Amy in the way!  The silk has a beautiful sheen to it and makes the fibre feel soft.  I split the half down the middle and spun both from the same end and you can see there are spot where the colours lined up – particularly that pink stripe in the middle :o)

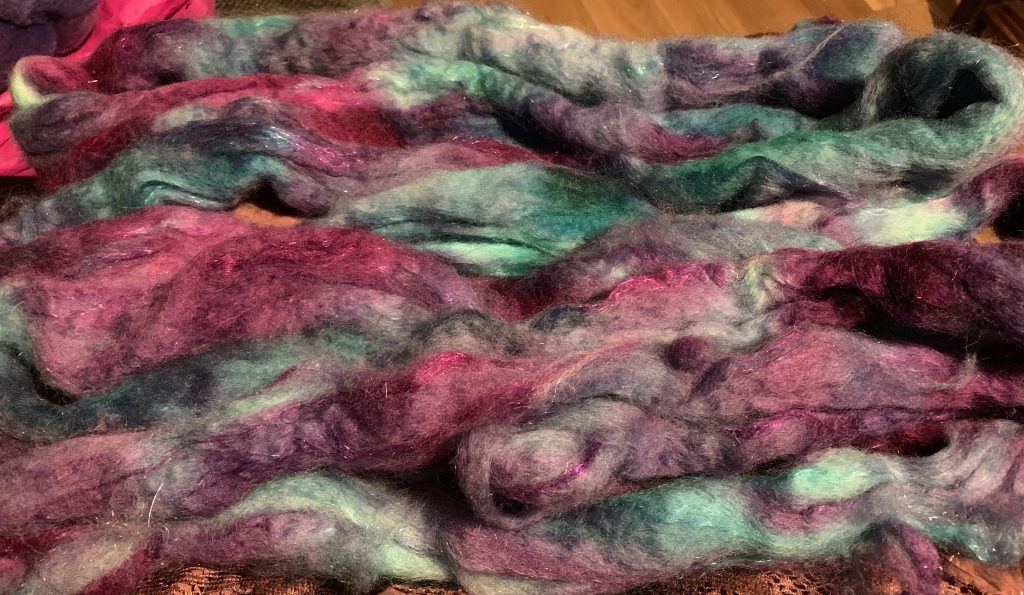
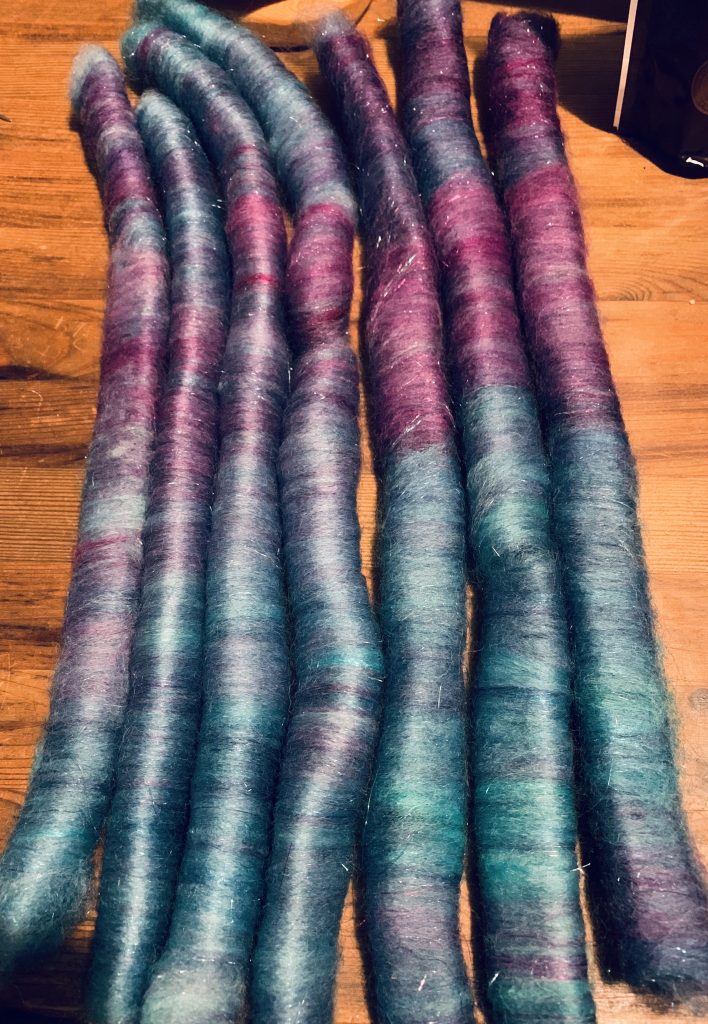
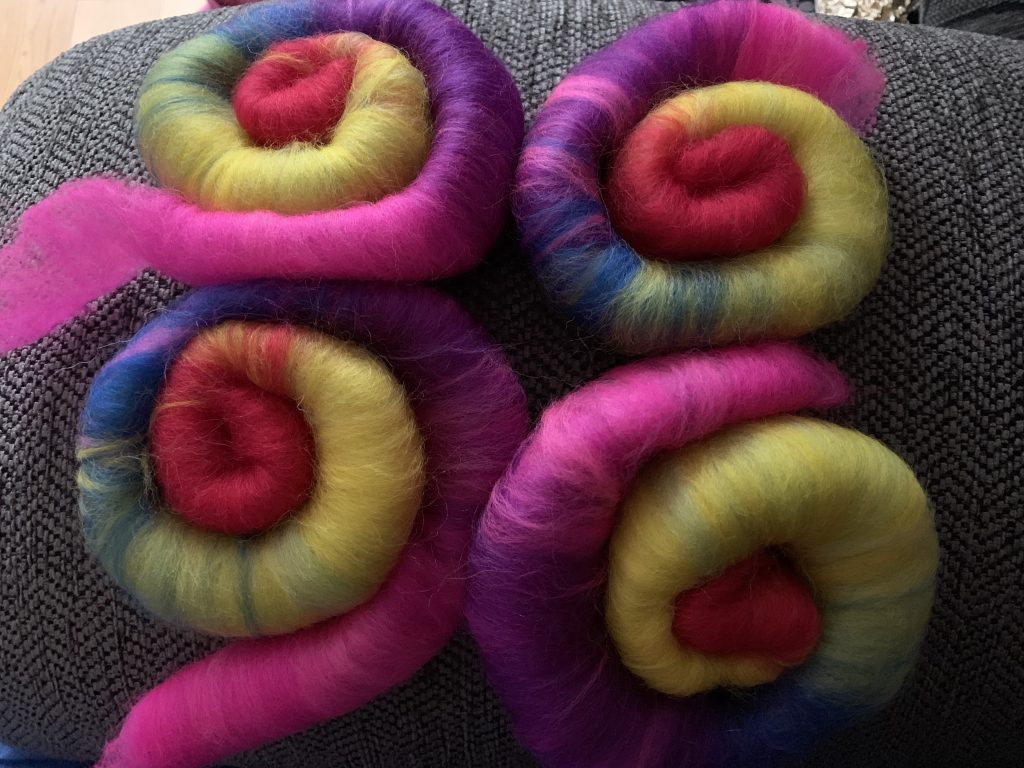
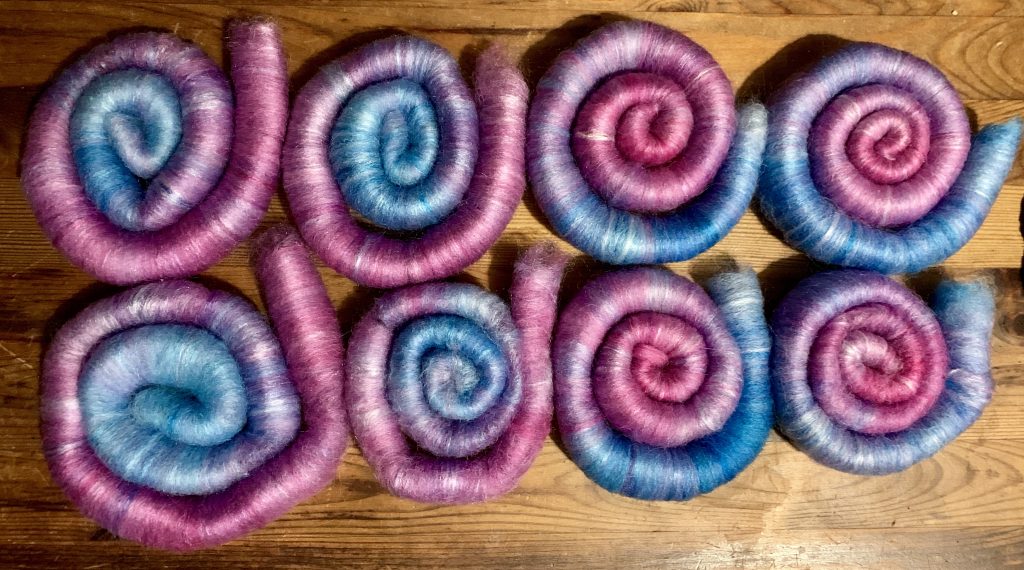
For the second half I grabbed my blending board again :o)  I know I can get about 25g on my board comfortably so far, so I again split the fibre in half lengthways to make sure all the rolags had a similar colour mix.  I just added the fibre straight from the long length onto the board, putting the blue patches at the bottom, the bright pink ones at the top, and purples in the middle.

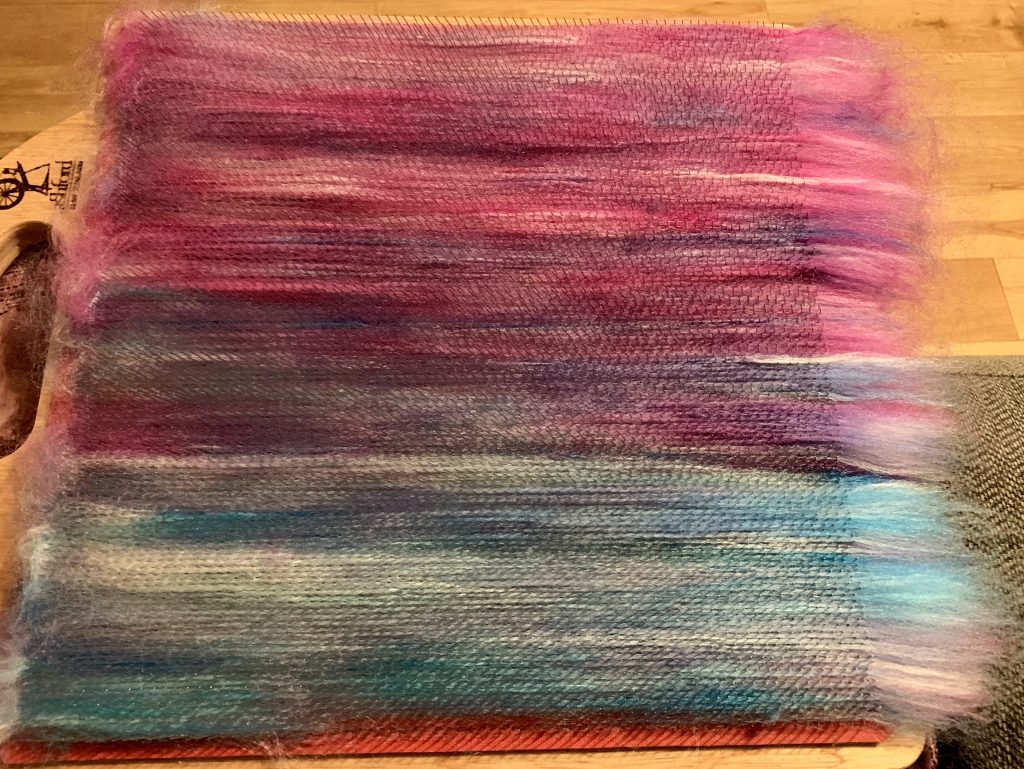
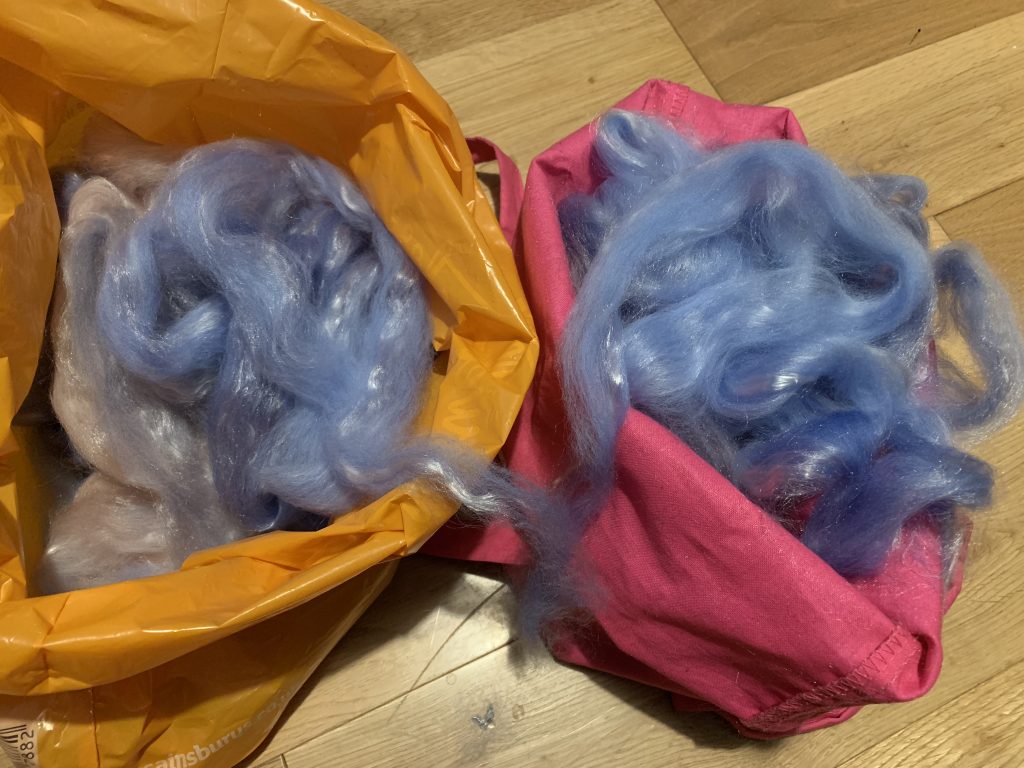
The resulting rolags have clear colour separation in them and somehow look nothing like the braid I started with!  I love how shiny these look thanks to the silk :o)

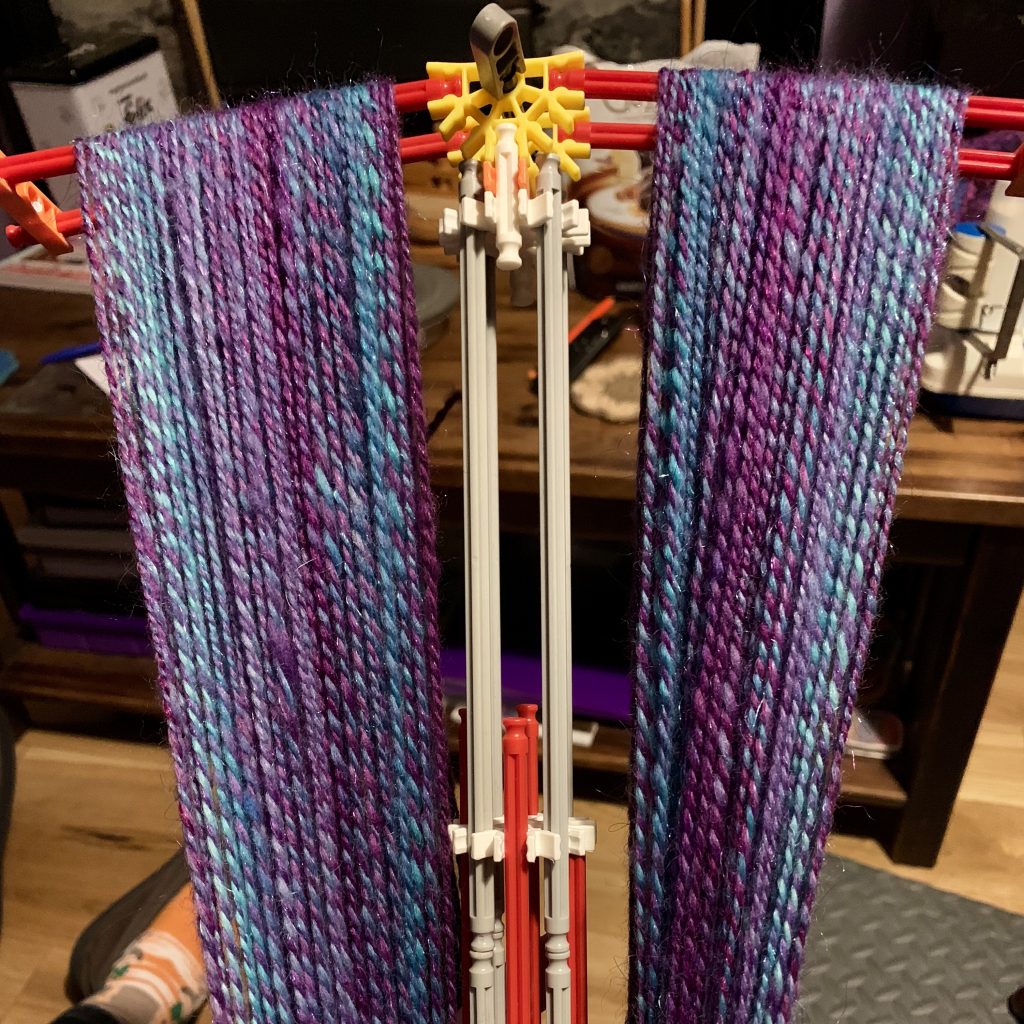
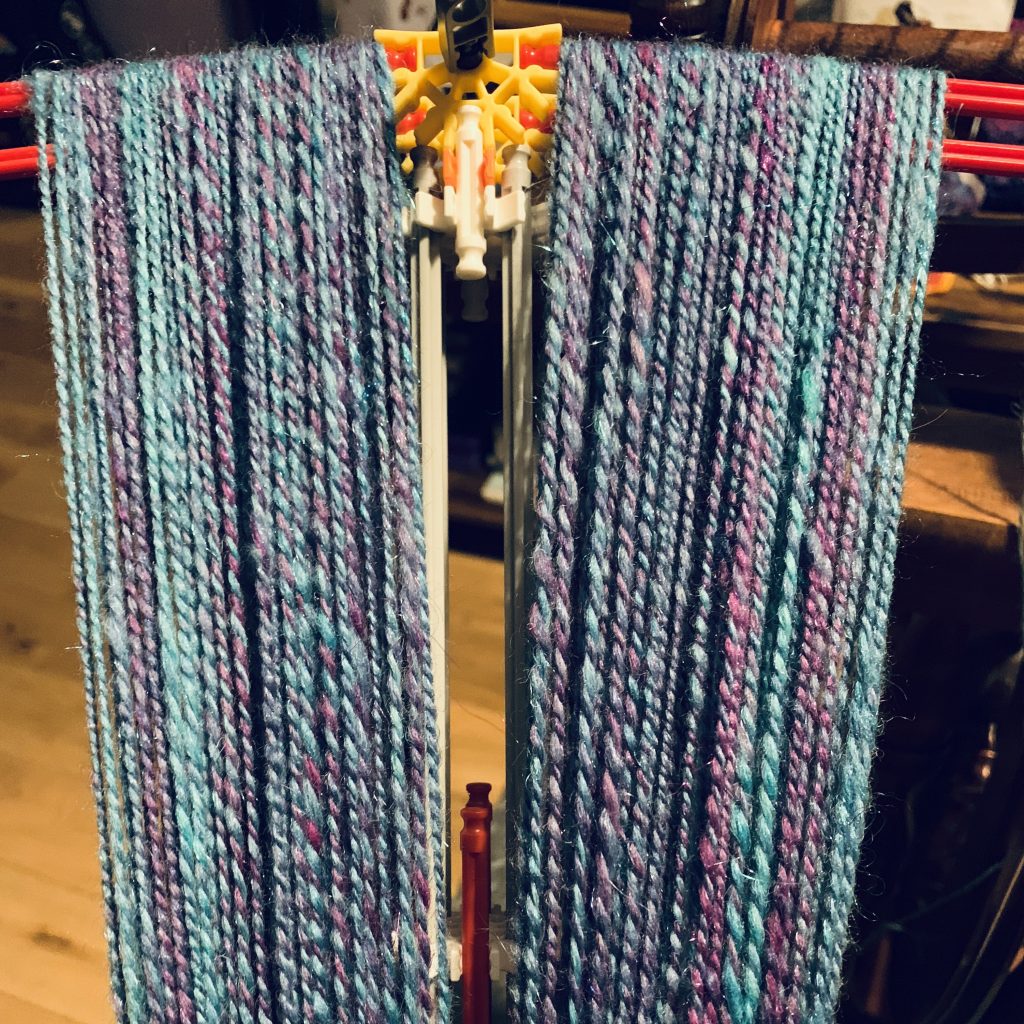
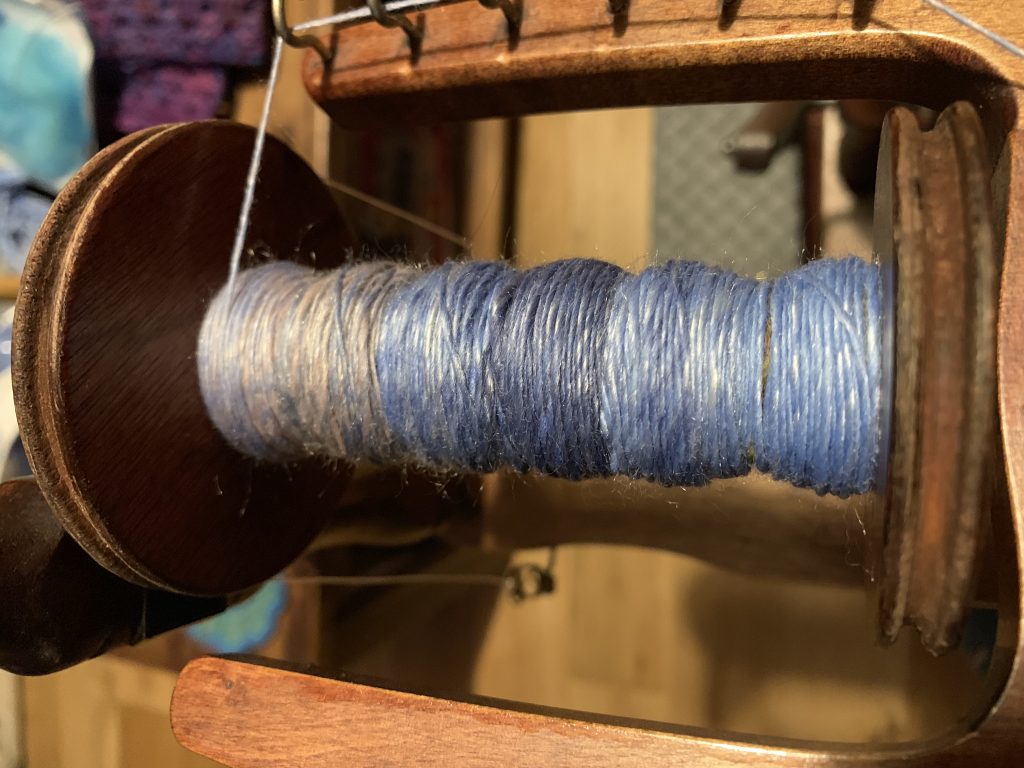
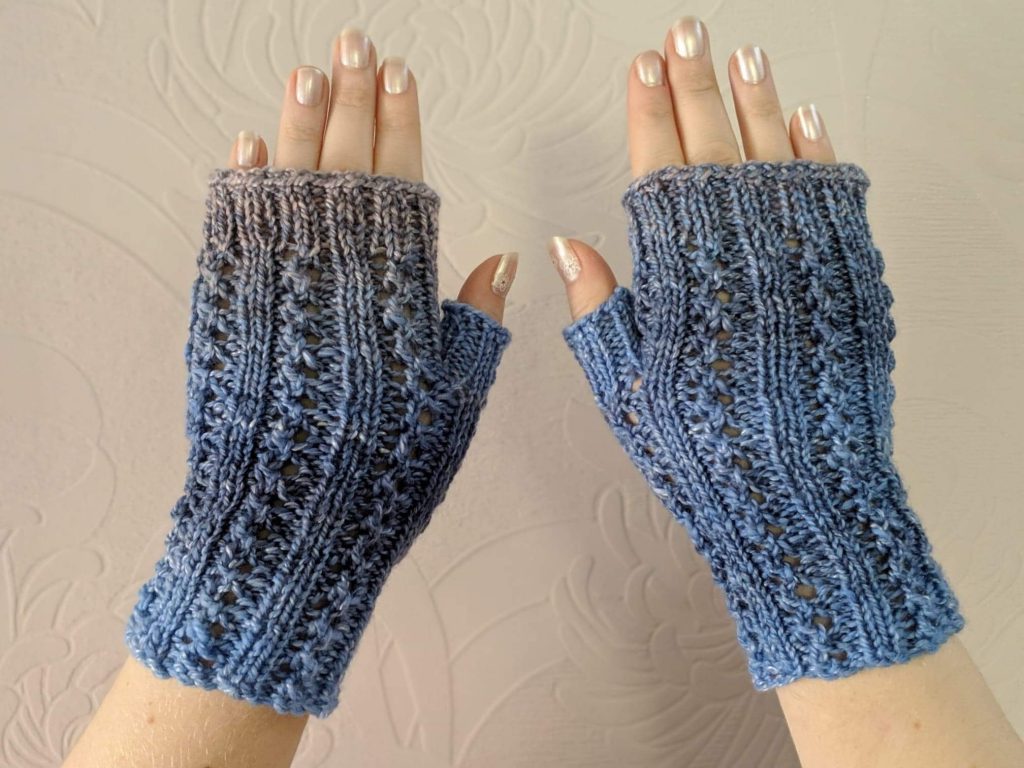
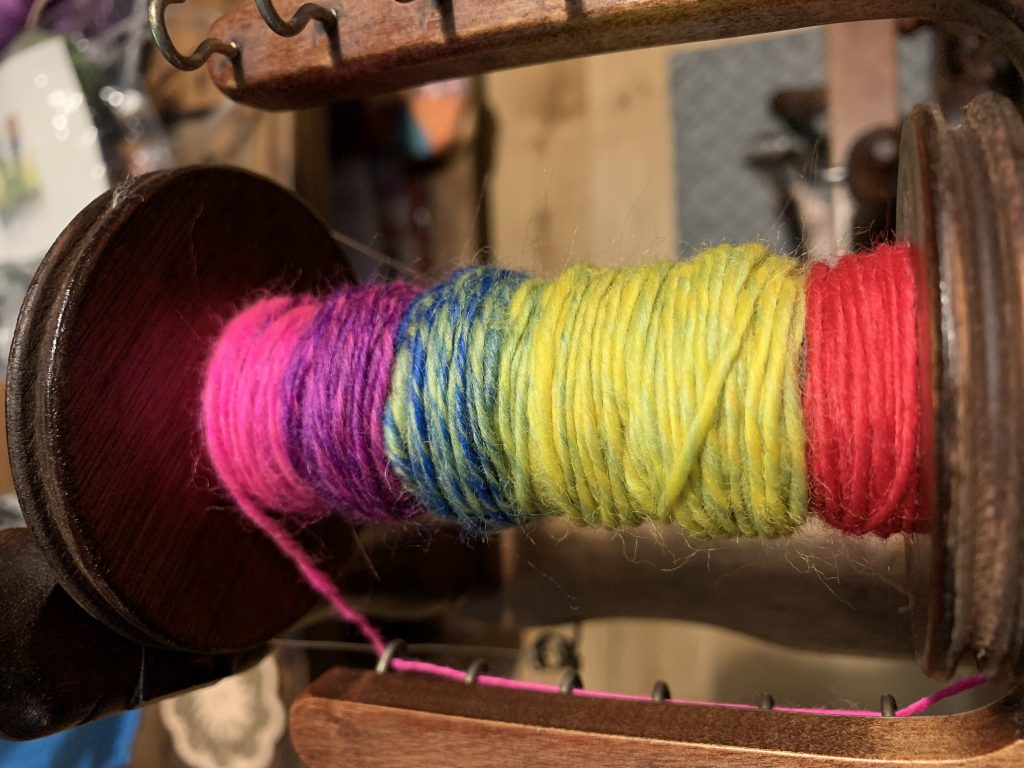
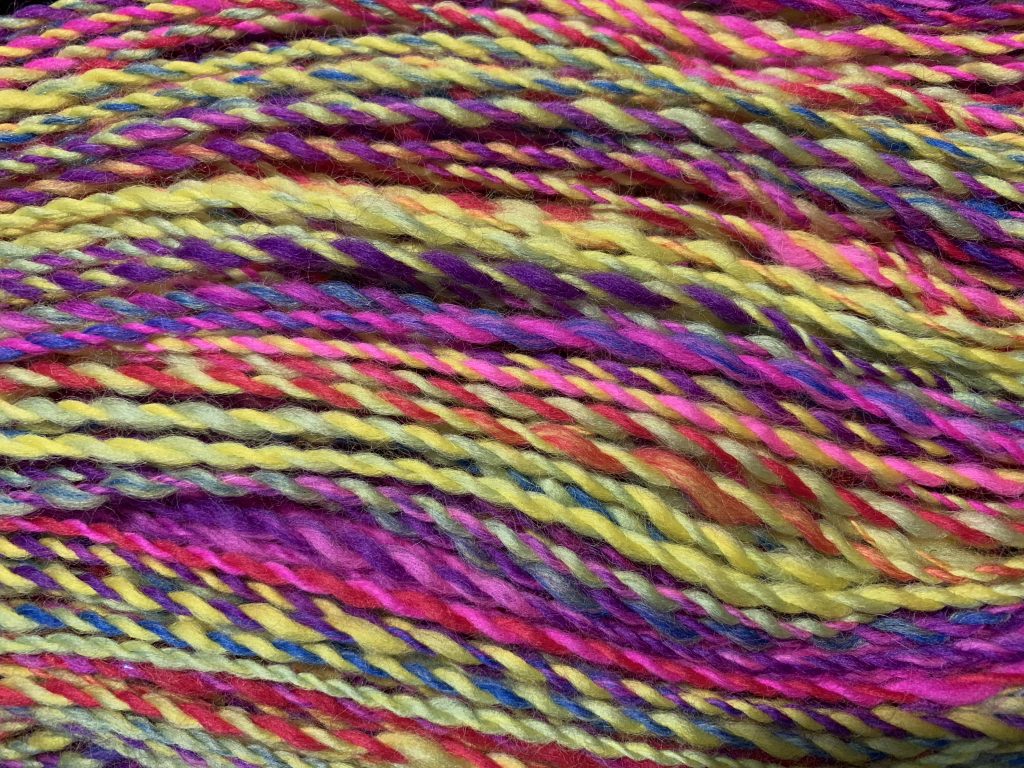
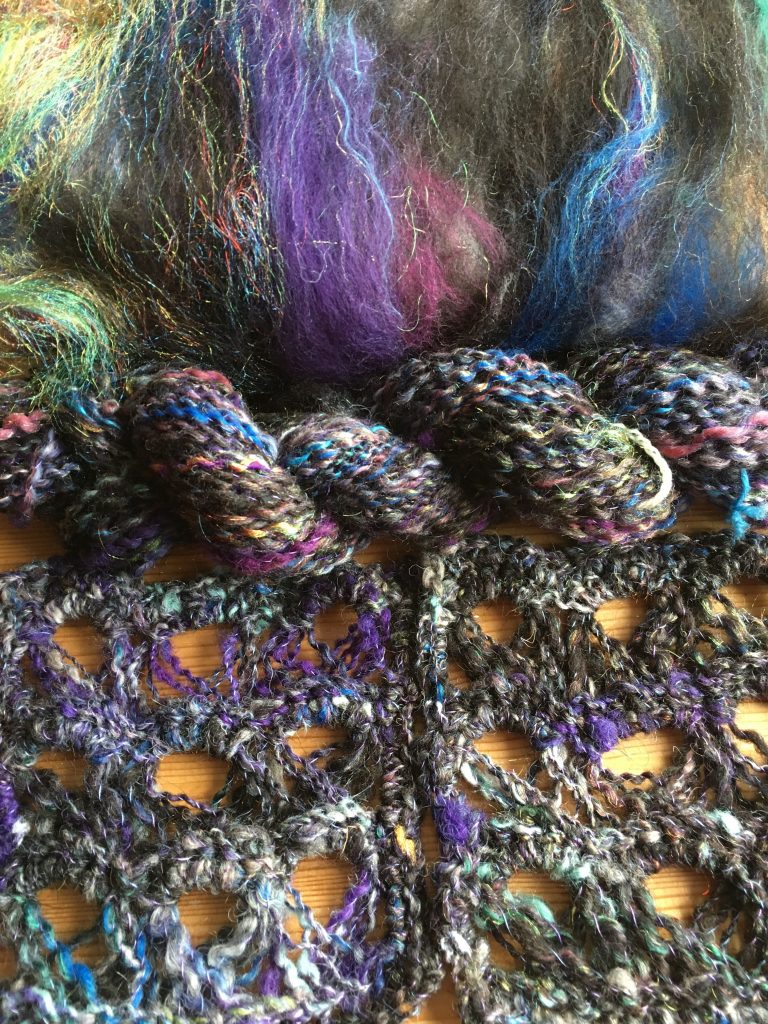
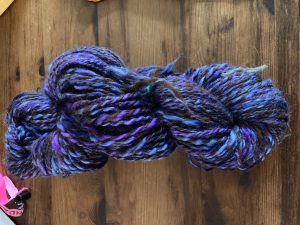
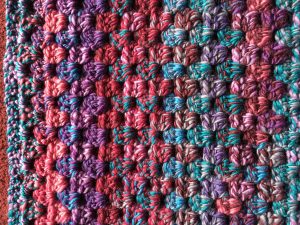
To get larger sections of the colours I opted to spin the rolags in alternating directions.  The first from blue to pink, the second from pink to blue, and so on.  This has given more clearly defined sections of colour in the final yarn.  Although at the same time, by blending them, the colours are more muted – the bright pink has been calmed down a little.  I’m not sure if that’s a good thing or not ;o)  It was a little harder to spin from the rolags, but that might be because I’m not as used to them yet.  I was pre-drafting the rolags through habit, and tried spinning straight from them for the second half which was actually easier.

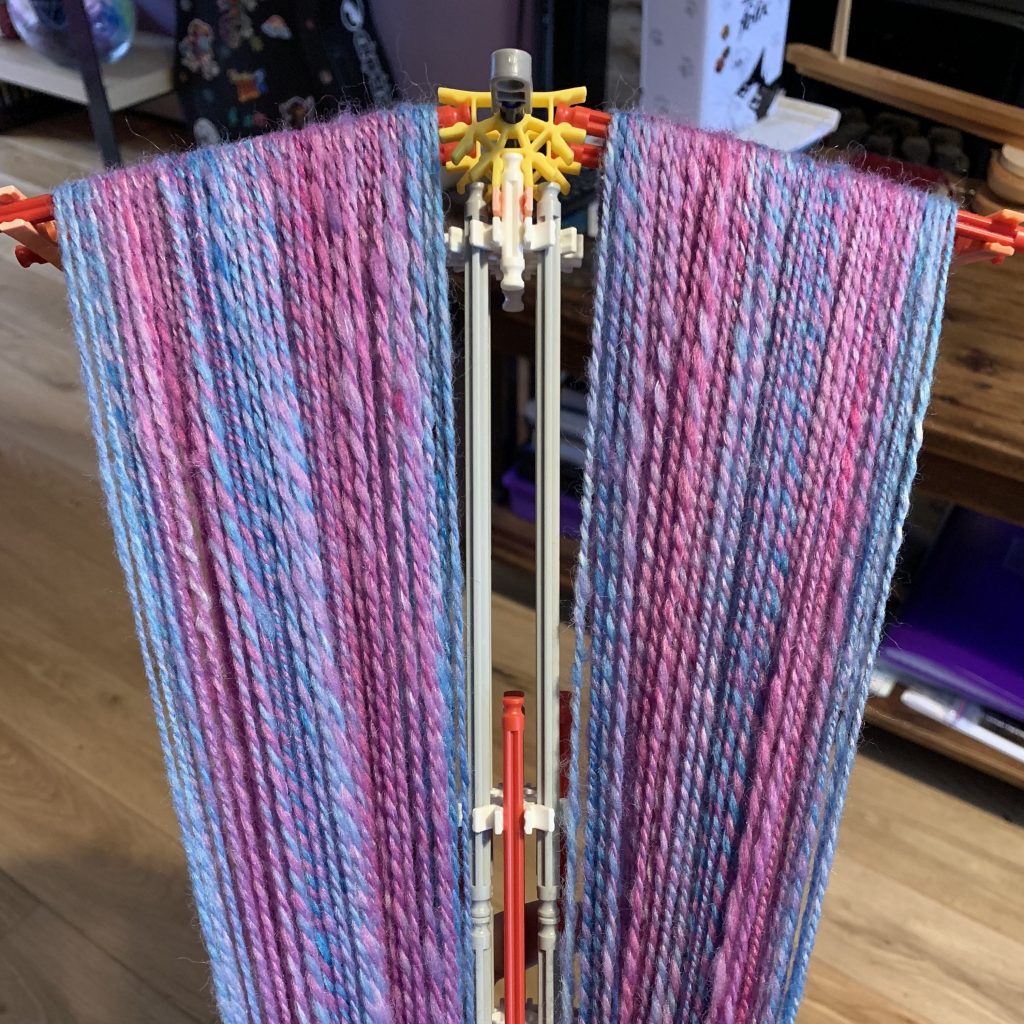
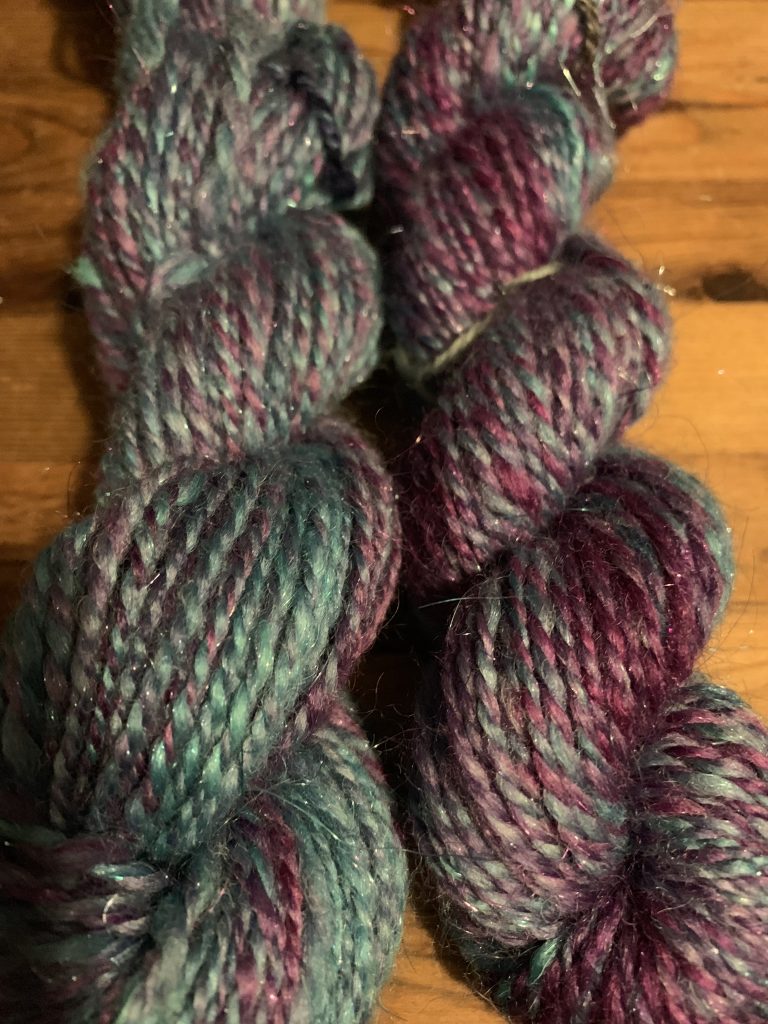
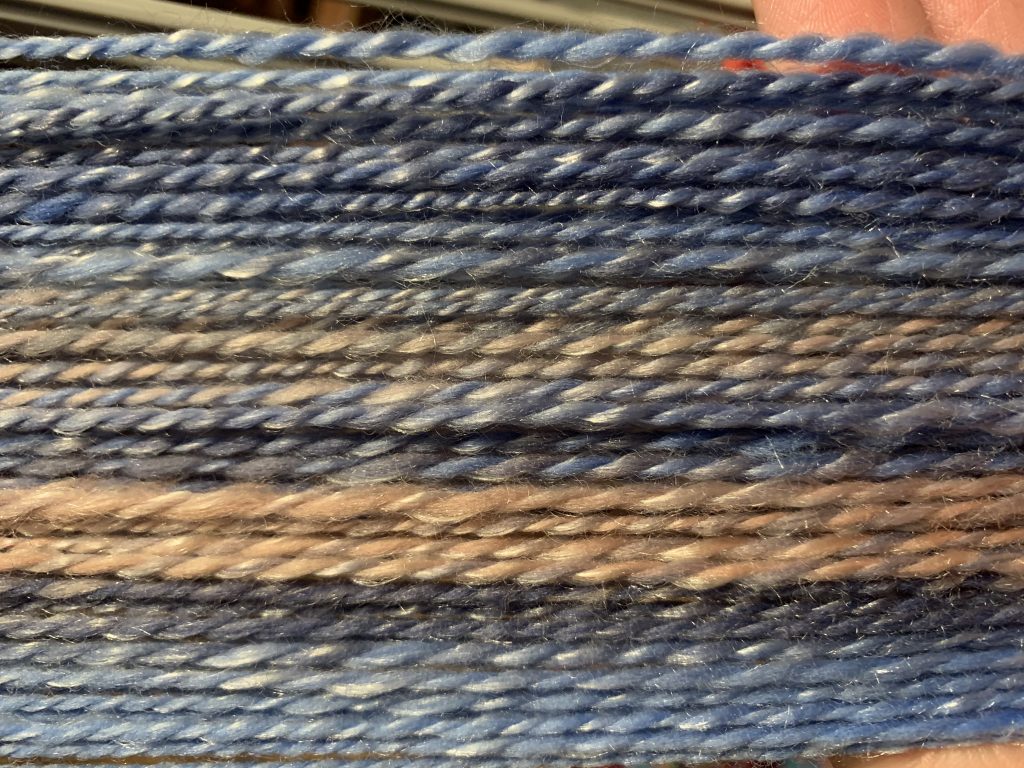
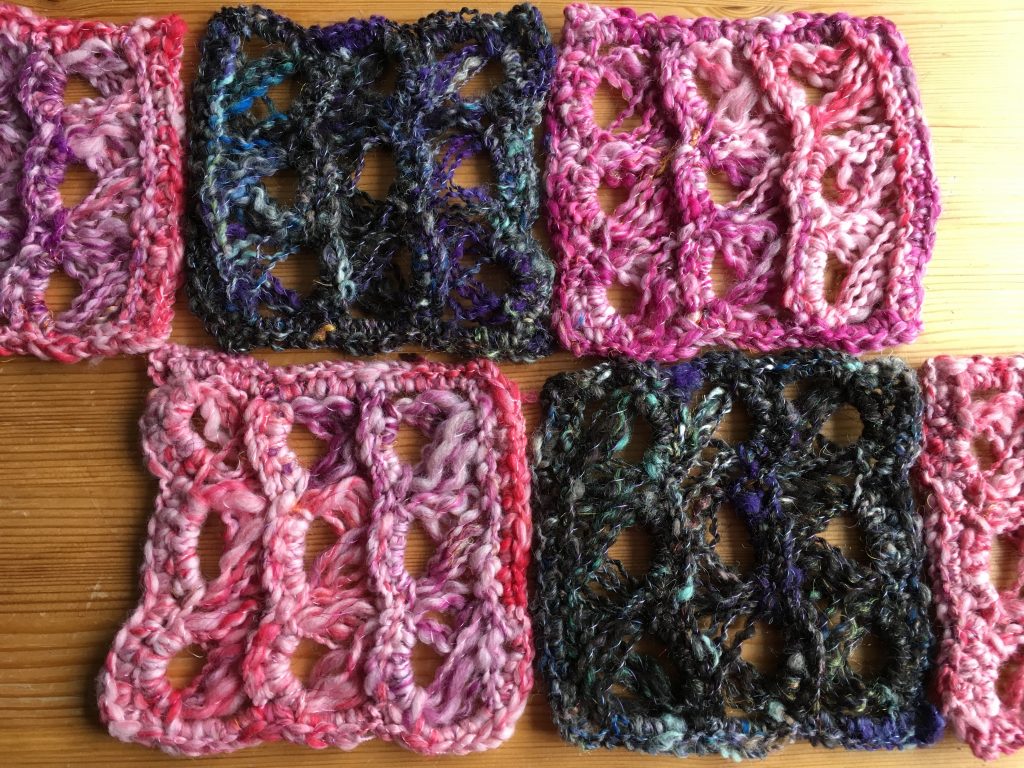
Here are both skeins before washing to show the difference in colours.

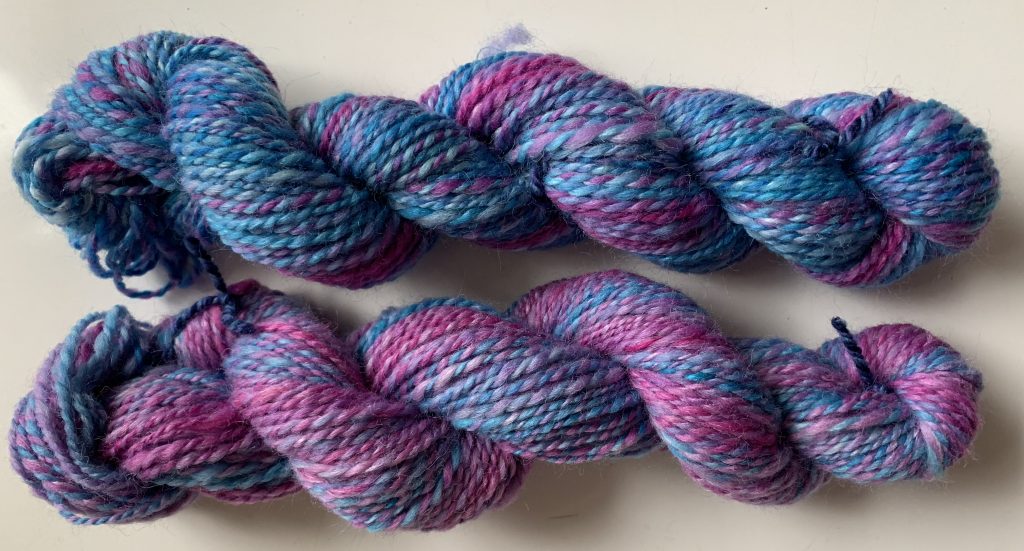
I had a little problem washing them with some dye leakage.  I had a very blue sink!  After 9 washes I think they’re okay now :o)

Breed Experiments – BFL/Nylon

January 11th, 2019

I decided it was time to try something other than Merino and thanks to The Shepherd Hut having a January sale I purchased a variety of fibre all in purples :o)

My plan is to try each braid at least two ways and then make a crazy cardigan out of the whole lot when I’m done :)

First up I decided to go for the BFL with trilobal nylon in “Minty Purple”. The nylon adds a lot of sparkle to the fibre which has quite a lot of lustre itself.

I started by splitting the braid in half and the first half I just spun straight from the combed top. Predrafting and then spinning, a simple 2 ply.

The fibre is pretty soft and easy to spin. It didn’t feel too different to the merino I’m used to. The nylon sparkles ended up everywhere! ;o) I suspect I will be finding them for weeks to come :o)

The nylon sticks out quite a lot and I’m concerned it might feel itchy.

I thought spinning from rolags might help trap the nylon inside better so I had fun with my new blending board splitting up the colours to make these:

I find spinning from rolags a little more challenging to keep even and there are a few bumps here and there. It did seem to trap the nylon better though!

It’s really hard to capture the colours well in the dismal lighting conditions at present!  I think the photos on the bobbins are probably the closest to reality.

They’re now both soaking and I’ll need to compare them properly once they’re dried :o)

Sky Gloves

December 19th, 2018

When Angela gave me my spinning wheel she also gave me some fibre to use including this lovely braid from Yummy Yarns for after I’d had some practise ;o)

It’s a beautiful soft mix of merino and tencel which has been hand painted. So pretty!

I laid it out to find the colour repeats and then split the braid into 4 matching pieces. I figured if I spun each of the 4 and plied pairs together I could probably get the colours to all line up :o)

2 pieces all pre-drafted and ready to spin :o) My hands never move as fast as my feet once I’m in front of the wheel and I find a thorough pre-draft really helps me make consistent yarn :o)  I dealt with both pieces I intended to ply together at the same time to try and ensure a similar thickness after drafting.

This is certainly my finest spinning to date and I really love the shimmer from the tencel :o)  It was absolutely beautiful to spin :o)

Plied together you can see the colour repeats aren’t quite lining up, but it’s pretty close ;o)

All finished! :o)  Washed, snapped and ready to knit with :o)

It seems I forgot to actually take any measurements of this yarn… so I can’t tell you how many yards I made, but I can tell you that it’s my first DK weight yarn! Woo! :o)

Shortly after finishing my spinning, Nikki complained about cold hands and liked the colours so I made her a pair of gloves :o)  The colour sections are more subtle now it’s spun and knit than it appeared in the braid, but they’re definitely there :o)  These only used about half of the yarn so I might have to make another pair with the rest :o)

Local Yarn Shops

November 8th, 2018

I make it my mission when we go away on holiday to find the little local yarn shops selling locally hand dyed yarn, and now floof too!  I’m just back from a trip to Florida and Vegas where I managed to visit 5 lovely little shops :o)

The first, A Bit O’ Yarn in Englewood didn’t seem to have any hand dyed yarn but did have a sale table ;o) I bought some lovely purple rafia to crochet a new hat and Chris chose some pink yarn for more socks :o)

Next up was Needlefish Yarns in Venice where I found some beautiful yarn hand dyed by Emma’s Yarn in this amazing Mexican Wedding Dress colourway. The shop was full of beautiful yarn, but a lot came from Ireland which seemed a bit crazy to buy in Florida! The lady in the shop even wound the yarn into a ball for me so I could get started on my next pair of socks whilst on holiday :o)

The final stop in Florida was to A Good Yarn in Sarasota. They were in the process of moving to new premises but still had some floof on display (and a lot of amazing yarn I somehow resisted!) I bought some lovely merino, bamboo, silk mix which was their fiber for Spinzilla :o) It’s beautiful :o)

Chris chose some bright neon fiber for me to play with and I also picked up a couple of replacement pin loom weaving needles as I’ve been having such a hard time finding them in the UK :o)

Once we were in Vegas I already knew of one yarn shop as I’ve been there before! Sin City Knit Shop has a good selection of local hand dyed yarn and I’d seen online that they had a new colourway for the local ice hockey team. Not that I know anything about ice hockey, but I wanted some anyway! ;o)

They’d actually sold out, but the owner asked her locals who were sitting knitting if anyone had an unused skein and happily sold me the yarn already wound into balls ;o) Chris chose some yarn and a pattern for a new hat too :o)

Oh, and they had a “trunk show” – a new to me phrase I had thankfully researched before being led into the back room ;o) Greenwood Fiberworks from Utah had sent a selection of beautiful yarn and fibre and I couldn’t resist this amazing rainbow braid with added sparkles :o)

The last stop was a new place in Vegas which had somehow never shown up in previous hunts despite having existed for years. Golden Needle Arts looks like a cross stitch kind of place mostly, but actually contains supplies for all kinds of crafts. I picked up some lovey purple malabrigo fibre and got to stroke a lot of kitties too :o)

Rainbow Mitts

October 19th, 2018

I ordered these beautiful rainbow rolags from Barn2Yarn which were quickly dubbed “rainbow snails” by my husband :o)  There were 11 in total, not just 4!

I like to pre-draft quite enthusiastically before I spin. This means my hands don’t have to do so much whilst I’m treadling and helps me achieve more consistent results :o)

It was really enjoyable watching the bobbin fill up with each rainbow :o) There were 11 snails in total so I put 6 on one bobbin and 5 on the other. It soon became apparent that there was more yellow than anything else in these rainbows and that getting the colours to line up wasn’t going to work!

Plying proved my suspicion and there is yellow throughout most of the yarn. I managed a fairly consistent Aran weight turning 97g into 140m.

I decided a pair of fingerless gloves would use up the yarn nicely and chose a fairly simple pattern so as not to detract from the yarn. The Eureka Valley Mitts seemed to fit the bill :o)

The pattern worked up quickly and it was lovely to see the rainbow stripes appearing as I knitted :o)

The finished gloves are super warm and snuggly :o) A little longer than I really needed, but I really like the faux cables :o)

I turned the leftover yarn into little squares using my pin loom and I was amazed by how different the yarn looks like this! :o)

Spinning Batts

October 10th, 2018

Patricia from Yummy Yarns kept sharing photos of her beautiful batts and eventually I gave in to temptation and purchased these two bundles of pretty :o)

I also bought some thread as I decided I wanted to try spiral plying to stop their colours becoming too muddled.

Opening out the bats and tearing them into strips to use was really fun. Each section was different and there was a surprising amount of pretty shimmer hiding inside the darker one! :o)

I saw a broomstick lace crochet wrap on the front of a magazine and did something I rarely do – I bought it! It did come with some cute broomstick lace tools which looked useful :o) I figured the lace would help show off the yarn with its big open loops and I slowly started making squares :o)

I was trying not to worry about lumps and bumps. Not really going all out “art yarn”, but embracing the different fibres wanting to do different things. My husband didn’t seem impressed with the inconsistency given I’d been showing off my smooth purple blanket yarn the day before! Spiral plying was really fun and I think the end result looks cool :o)

Spinning without worrying too much about consistency was very freeing, but it was a little challenging at times working from the strange mixture of fibres – some wanted to draft much more easily than others! I really enjoyed seeing each batt turn from a bundle of fibre into yarn and then into squares :o)

I hadn’t left an awful lot of yarn for the border so I joined them by sewing with some of the thread. This reminded me that I hate sewing squares together! Wow it took a long time. Not helped by managing to get 3 squares attached the wrong way and having to redo them! Ugh! But eventually I got them all joined :o)

I had to get the scales out for the border to make sure I didn’t end up with any partial rounds (it’s not easy to undo this yarn). So the border is fewer rows than the pattern, but since I changed the square construction too this is no surprise. I’m not good at following patterns ;o)

The final wrap got a good blocking which really helped even out the squares and open up the border.  I wore it to Yarndale and it received a number of lovely comments :o)

Return to Spinning

October 9th, 2018

It has been years since I last spun any yarn, literally! My Mother actually found my membership card for the New Forest Association of Guilds we joined for Saturday social spinning in 1994!

Bizarrely, I recently found the last yarn I spun over 20 years ago stashed at the back of a draw!

I’m definitely going to have to try washing this and, assuming it doesn’t fall apart, make something with it :o)

Back then I didn’t really knit or crochet or have anything to do with the yarn I created. As fun as it was, the process stopped there.

Recently my parents came to visit and my Mother turned up with her Ashford Traveller wheel for me to try out and see if I still enjoyed spinning. The answer was a resounding yes! :o)

So much so I apparently wanted to start writing a blog again to share my creations :o)

My first yarn was rather lumpy, bumpy and very bulky! But I had just enough to make a little scarf! :o)

From floof to finished item was incredibly satisfying :o) So much so that I quickly ordered more merino tops and began my experimentation blanket. A simple granny stripe blanket I can use all my crazy attempts on, in purple ;o)

My most interesting discovery so far is that when I crocheted I was undoing the ply in my yarns and in fact I need to spin “backwards”. So now I spin my singles anticlockwise and my plying is done clockwise and the newer yarn remains nicely plied as I crochet :o)

The left of the photo shows the new rows where the yarn stays plied whereas on the right you can see that the 2 plies end up just sitting next to one another. Interesting and useful to know! :o)

Crocheting Blanket Squares Together

April 9th, 2014

Apparently I crochet blanket squares together in a strange and unusual way!  I tried to find a tutorial to show a friend how I do it, but I couldn’t find anything quite like it… so I thought I’d better write my own! :o)

I don’t like sewing.  There, I said it.  When faced with a giant pile of squares ready to combine into a blanket there was no way that sewing was going to be the answer.  I had seen various “join-as-you-go” methods but that requires too much early planning.  I like to make a giant pile of squares, then lay them out all over the floor to decide on the layout, and then join them.  So I came up with a method which is kind of like “join-as-you-go” except that I do it all at the end :o)

Here are the 4 tiny squares I made quickly to demonstrate the technique.  These intentionally have different numbers of stitches on the edges, because it doesn’t matter :o)  I tend to make very random blankets, so the edges are always different numbers! :o)  The arrows show the order we’re going to crochet along the edges.  This can easily be expanded to the size of your blanket, just keep going all the way along one column before going around the top and down.

For the edging I usually use black, but here I’m using green as it showed up nicely against my red background :o)  I work a very simple border.  Join in a corner, ch3 (counts as a dc) and then dc in the same space. dc in the first stitch below, chain 1, skip a stitch and dc in the next.  Repeat across.  2dc, chain2, 2 dc in the corner.  Repeat pattern across the second edge, 2dc in the corner and then chain 2.

The edge pattern can be easily adjusted depending upon the number of stitches on the edge of your square, you just need to ensure you have the same number of spaces each time.  Sometimes this will mean not skipping so many stitches if you have a small square, or perhaps skipping 2 stitches beneath a chain if you square is larger.

Your next 2 dc go in the corner of the next square.  Now we start joining!  As my second square is smaller than the first I’m going to skip the first and last dc’s so I can still get 5 chain spaces across the edge easily.  So to continue the pattern I would do a chain next, but first, I’m going to slip stitch into the first chain space on the first square, like this:

So now the pattern becomes: dc, slip stitch into chain space, chain 1, skip a stitch, dc in next stitch.  Repeat across to join the 2 squares and then 2dc in the corner.  Slip stitch into the chain 2 space in the corner of the first square, and then chain 2 and 2 dc into the corner of this square.

Now you’re going to continue your border patter along sides 4 and 5.  At this point if you had more squares you would repeat what we just did above, but as we don’t, we’ll crochet down the other side (6 & 7).  At the bottom we join the third square in just the same way as we did the second, with the second 2dc of the corner jumping into the next square.

After side 8 you’ll be faced with a more interesting looking corner, although you do just the same as you would expect – slip stitch into the space next to you and then do your chain 2 and 2dc.  The fourth time you come to that corner it gets a little more interesting – you need to slip stitch into the chain 2 space on the previous square, then chain 2, and then slip stitch into the chain 2 space of the bottom left square before doing your second 2 dc in the corner.  Hopefully the pictures explain all this better than my words!

In case you’re struggling on how to hold the squares, here’s a photo of the way I hold to to the slip stitches between the squares.  Also a photo of the finished squares! :o)

The border lies flat almost immediately, and after a wash and dry it’s even better :o)  I’ve used this on all of my blankets so far and it works up really quickly.  Plus there’s only ever 2 ends to sew in – the start and the finish!  Assuming you have a large enough ball of yarn to do the whole lot in one go of course! :o)

Sasha decided to get in the way just as I was trying to take the final photo, so I thought I’d share this photo too :o)

Obviously if you have any questions please leave a comment :o)

Travelling Home

February 23rd, 2014

The trip home started early on Tuesday morning. We bundled all our stuff into the car and began the long drive back to LA.

We stopped in Baker for breakfast and to buy jerky :o) The Burger King had fabulous door handles!

20140223-103451.jpg

The drive was fairly easy and uneventful, just long! We did online checkin on the bus journey from the car dropoff to the airport :o) Quickly got through security and then flopped in the airport. We wanted to eat but everything was ridiculously expensive and squashed in the eating areas. So I doodled and Chris worked until it was time to board.

20140223-103709.jpg

Air New Zealand flights are lovely :o) We get served proper food on proper plates with proper cutlery! :o)

20140223-103820.jpg

They have a great entertainment system which you’re able to start using as soon as you board! No waiting to be in the air and for them to turn it on!

They also have silliness in the bathrooms :o)

20140223-103927.jpg

We spent most of the flight working. I managed to get all of the images reworked for Doodle Patterns :o) Obviously we decided it was time to sleep just as they started to serve breakfast! But at least it was a very tasty breakfast :o)

20140223-104122.jpg

Quesadilla with chorizo and scrambled egg! Along with cereal, yogurt, fruit, and warm croissants with jam :o) Yummy! :o)

Then we were back in England and after another very long drive, finally home to the kitties :o)

Final day!

February 23rd, 2014

Monday was our last full day in Vegas :o( We started off with breakfast at Terrible’s… Which was unfortunately terrible :o( We were tempted by their special Presidents’ Day buffet. Should have stuck to the cafe :o(

We had errands to run for much of the day – last minute shopping we needed to do, and making sure we’d played points on the cards we needed to keep active.

To make up for the not so fabulous final day we treated ourselves to a trip to the Cheesecake Factory :o)

20140223-103057.jpg

The tasty food certainly improved the day :o)

After that we walked through Caesars to their gardens where we got married :o)

20140223-103218.jpg