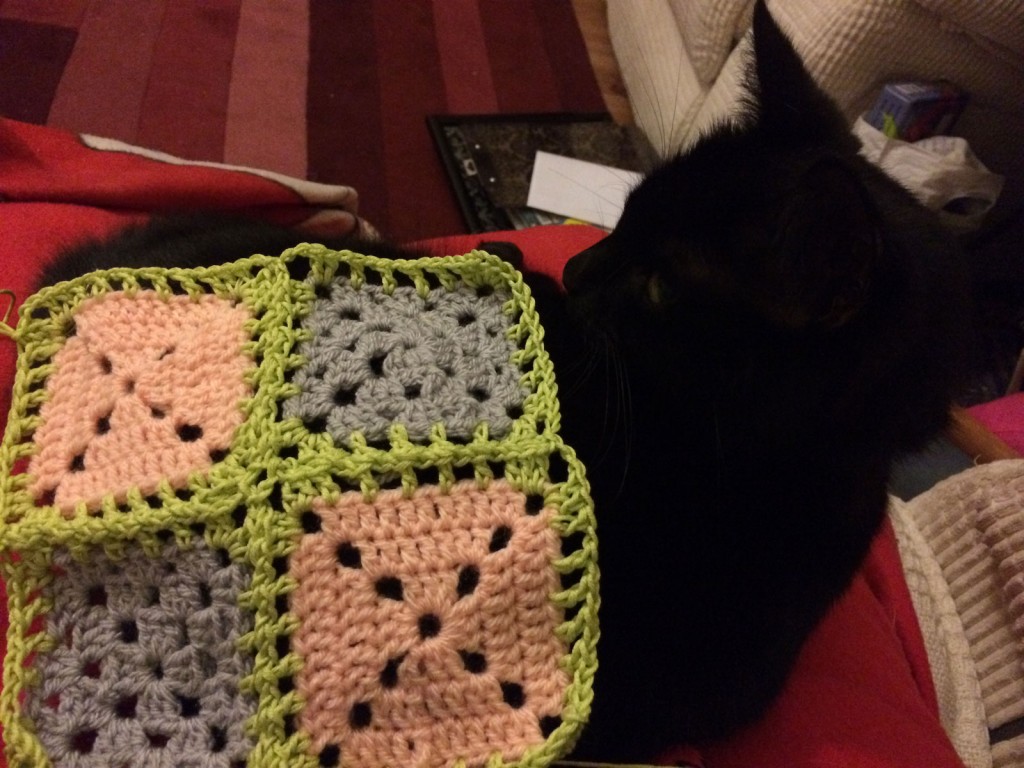
Apparently I crochet blanket squares together in a strange and unusual way! I tried to find a tutorial to show a friend how I do it, but I couldn’t find anything quite like it… so I thought I’d better write my own! :o)
I don’t like sewing. There, I said it. When faced with a giant pile of squares ready to combine into a blanket there was no way that sewing was going to be the answer. I had seen various “join-as-you-go” methods but that requires too much early planning. I like to make a giant pile of squares, then lay them out all over the floor to decide on the layout, and then join them. So I came up with a method which is kind of like “join-as-you-go” except that I do it all at the end :o)
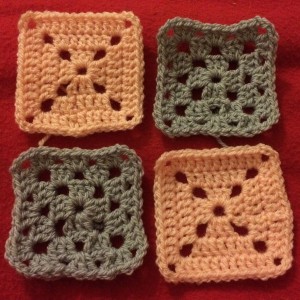
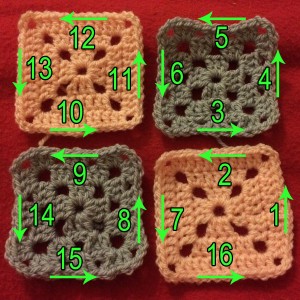
Here are the 4 tiny squares I made quickly to demonstrate the technique. These intentionally have different numbers of stitches on the edges, because it doesn’t matter :o) I tend to make very random blankets, so the edges are always different numbers! :o) The arrows show the order we’re going to crochet along the edges. This can easily be expanded to the size of your blanket, just keep going all the way along one column before going around the top and down.
For the edging I usually use black, but here I’m using green as it showed up nicely against my red background :o) I work a very simple border. Join in a corner, ch3 (counts as a dc) and then dc in the same space. dc in the first stitch below, chain 1, skip a stitch and dc in the next. Repeat across. 2dc, chain2, 2 dc in the corner. Repeat pattern across the second edge, 2dc in the corner and then chain 2.
The edge pattern can be easily adjusted depending upon the number of stitches on the edge of your square, you just need to ensure you have the same number of spaces each time. Sometimes this will mean not skipping so many stitches if you have a small square, or perhaps skipping 2 stitches beneath a chain if you square is larger.
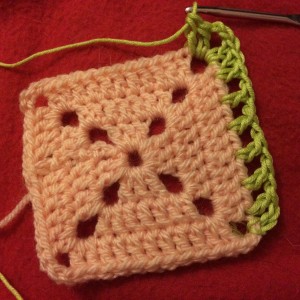
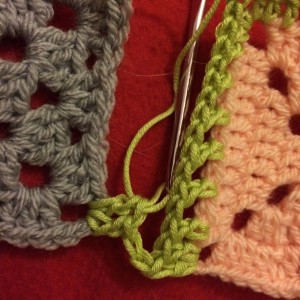
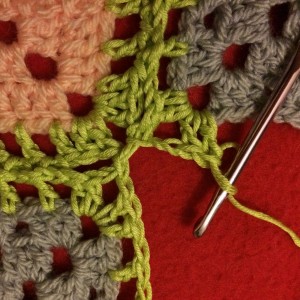
Your next 2 dc go in the corner of the next square. Now we start joining! As my second square is smaller than the first I’m going to skip the first and last dc’s so I can still get 5 chain spaces across the edge easily. So to continue the pattern I would do a chain next, but first, I’m going to slip stitch into the first chain space on the first square, like this:
So now the pattern becomes: dc, slip stitch into chain space, chain 1, skip a stitch, dc in next stitch. Repeat across to join the 2 squares and then 2dc in the corner. Slip stitch into the chain 2 space in the corner of the first square, and then chain 2 and 2 dc into the corner of this square.
Now you’re going to continue your border patter along sides 4 and 5. At this point if you had more squares you would repeat what we just did above, but as we don’t, we’ll crochet down the other side (6 & 7). At the bottom we join the third square in just the same way as we did the second, with the second 2dc of the corner jumping into the next square.
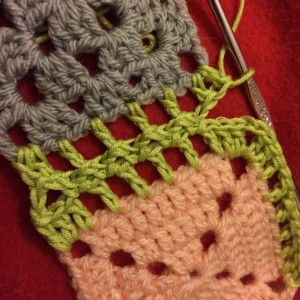
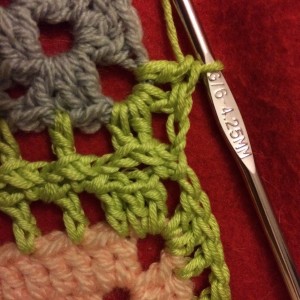
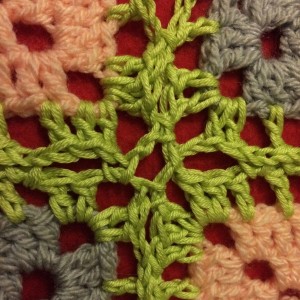
After side 8 you’ll be faced with a more interesting looking corner, although you do just the same as you would expect – slip stitch into the space next to you and then do your chain 2 and 2dc. The fourth time you come to that corner it gets a little more interesting – you need to slip stitch into the chain 2 space on the previous square, then chain 2, and then slip stitch into the chain 2 space of the bottom left square before doing your second 2 dc in the corner. Hopefully the pictures explain all this better than my words!
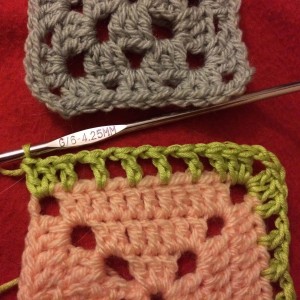
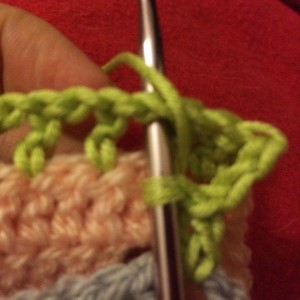
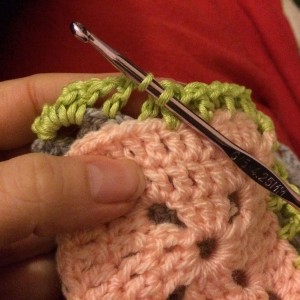
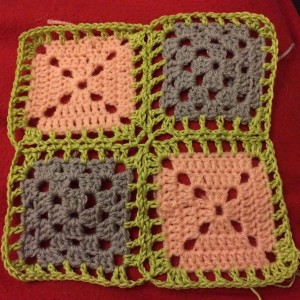
In case you’re struggling on how to hold the squares, here’s a photo of the way I hold to to the slip stitches between the squares. Also a photo of the finished squares! :o)
The border lies flat almost immediately, and after a wash and dry it’s even better :o) I’ve used this on all of my blankets so far and it works up really quickly. Plus there’s only ever 2 ends to sew in – the start and the finish! Assuming you have a large enough ball of yarn to do the whole lot in one go of course! :o)
Sasha decided to get in the way just as I was trying to take the final photo, so I thought I’d share this photo too :o)
Obviously if you have any questions please leave a comment :o)

